Case study: natural swimming pond
Case study: natural swimming pond
Charles built a chemical-free swimming pond in his garden as a DIY project. Here’s what he learned about going au-naturel.
The idea of swimming in a freshwater pool that invites nature in rather than killing it with chemicals is fast growing in popularity. Charles and his family chose a natural swimming pond over a chlorinated pool because it was eco-friendly and harmonious with the rural landscape surrounding their home.
Charles said: “A conventional swimming pool is expensive to run, would be rarely used economically in relation to the outlay required and adds nothing to either the environment or the aesthetic attraction of a natural landscape.”
Whereas if a pond is not used for swimming, it can still look great with water lilies floating on the surface and iridescent dragonflies flitting through the reeds - and is a wildlife habitat, too. But be prepared to share your swim with the life that helps keep the water clear and clean.
Charles said: “It’s truly amazing. I have two grey wagtails that always come down to the water’s edge and nod at me as I plough up and down. Swifts and swallows swooped around my head, skimming insects off the water near me. The sun dapples the water between the trees. It is just like, well, swimming in the wild.”
What about mud between his toes and wriggly things at the bottom of the pond? “No mud - all filtered out by the gravel. and I haven’t met anything wriggly – yet. I might get a bit ruthless if a team of ducks decided to take over but otherwise all wildlife is welcome as it is meant to be.”
Most people get natural ponds built by a specialist contractor, but Charles took the plunge and dug his own. “A little bit of internet research quickly identified that a turnkey project was beyond our means, but many had created their own ponds as a DIY project,” said Charles who did the bulk of the work himself with expert help from a local landscaper and a friendly brickie.
The pool project came after the retired Lieutenant Colonel in the Royal Artillery oversaw the building of a sustainable, multigenerational home for his extended family on their 3.5-acre plot. Two years after completion – during which time he created a vegetable garden – he started work on the pool.
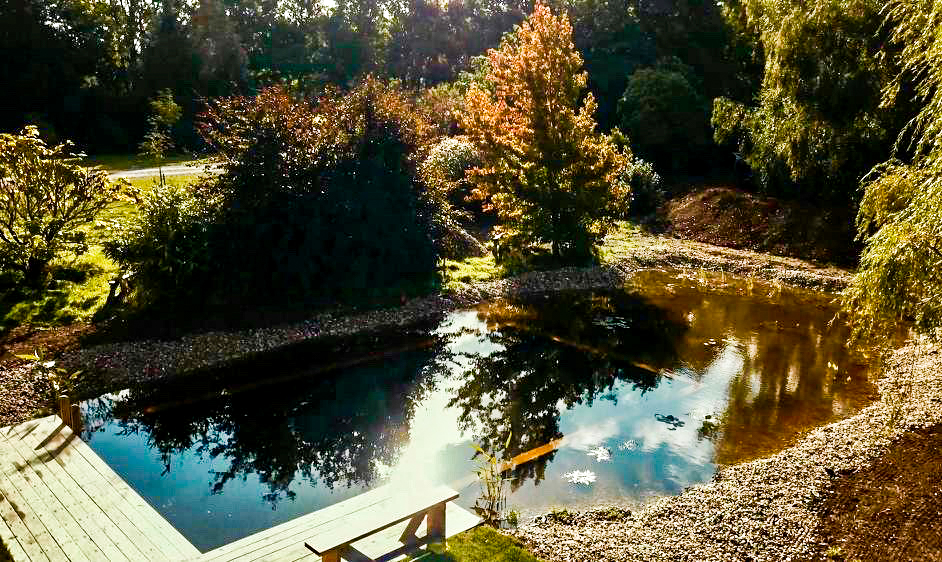
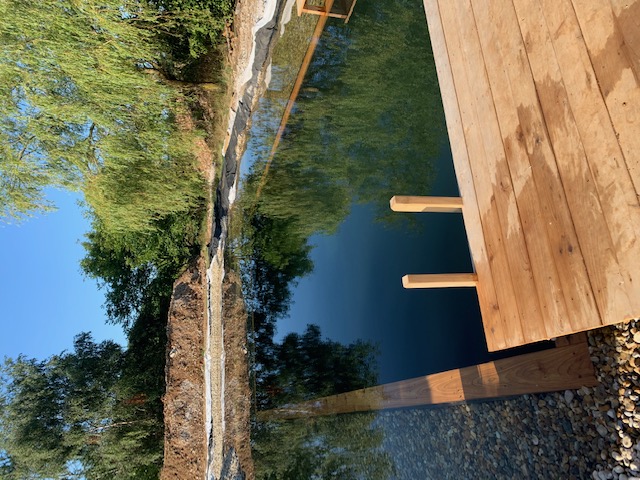
Natural swimming ponds have separate zones for swimming (a deep pool) alongside shingle beds, known as the regeneration area. Water is pumped through the shallow, regeneration areas with abundant plant life and marine aggregate that act as natural filters.
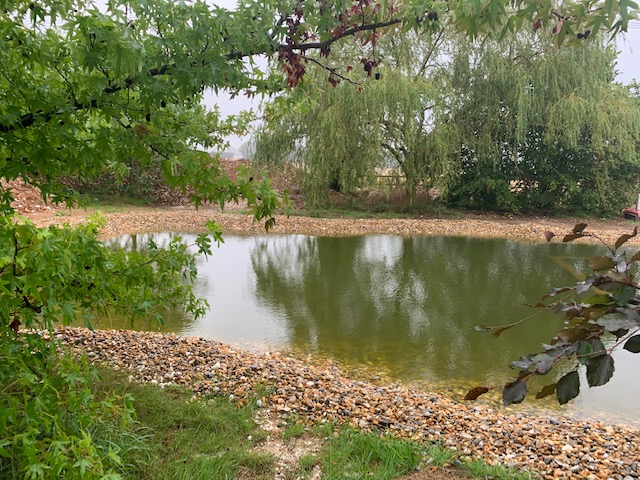
A barrier separates the two zones, stopping the shingle from spilling over into the main pool. Depending on the design, the regeneration zone makes up at least the same water surface area as the swim zone. Due to the space requirements, natural ponds are best suited to larger gardens and rural areas.
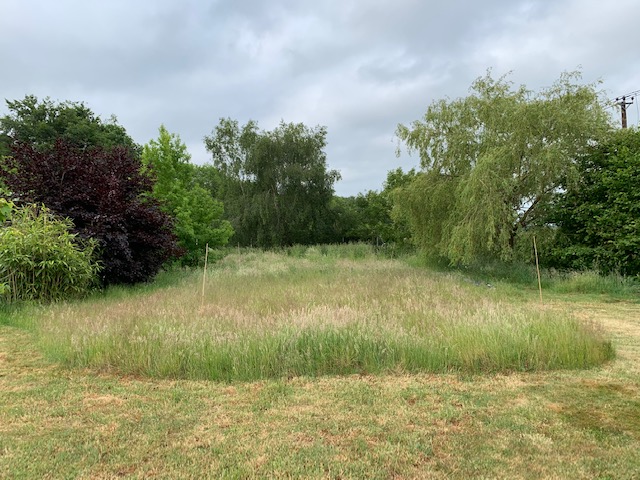
The pond can be informal or regular in shape. Charles opted for a 10m x 5m pool with a depth of 1.8m. “We found it very helpful to let the grass grow where we intended to put the pond and then mow round it in order to get a visual perspective of the ground implications.”
Just like any swimming pool, a natural pond needs to be constructed on a level or levelled site. “It may look flat, it may feel flat but a miscalculation as to the reality might result in your pond draining neatly into your nextdoor neighbour’s property,” said Charles. “You need to laser the perimeter and identify your lowest point and horizontal water surface.”
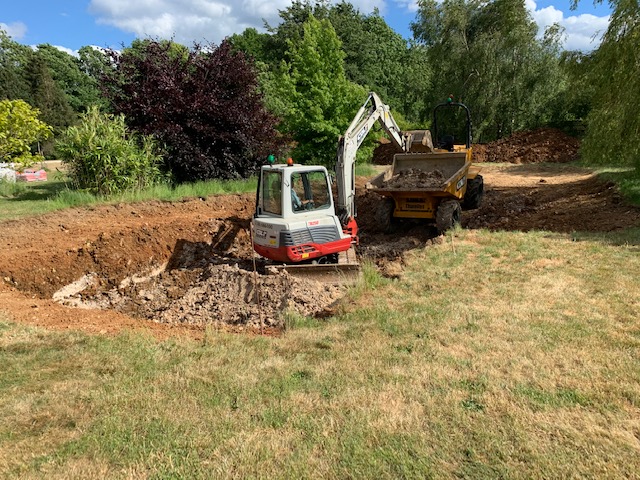
Digging the giant hole involved “getting the toys out” said the former Army officer, who operated the dumper truck - “a big boy’s dream.” Together with a good-sized digger and someone to work it efficiently, the excavation took about three days.
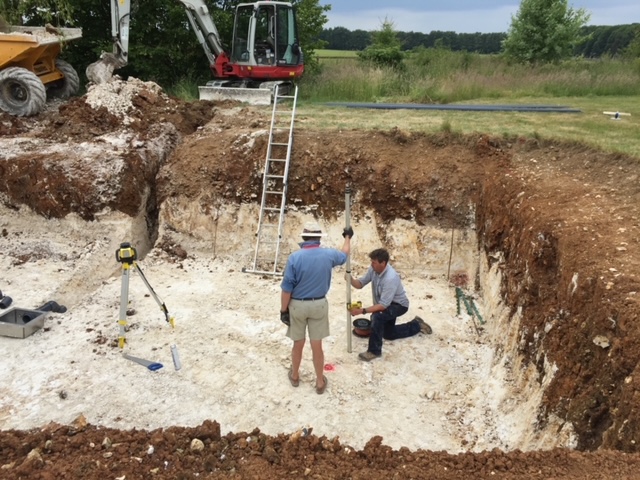
“Throughout the dig, you need to check levels and depths,” said Charles. He estimated they excavated the equivalent of 30 truckloads of spoil. Transporting it all off site would have added about £10,000 to the cost. Instead, much of the soil was kept for backfilling and landscaping.
“Care needs to be taken to keep good topsoil separate from the claggy stuff and the barely reusable. The thought process needs to consider the type of soil coming out – good topsoil (keep), clay (yuck), chalk (not the best for landscaping but great drainage.)
His logistical planning skills proved useful when it came to stopping the site turning into a muddy “film set for Passchendaele” especially when it rained. As well as a track plan, he organised dump and clean down areas.
Understanding the soil structure helps when it comes to considering the potential for over-engineering. Charles said: “One thing is certain – professional advice will err on the said of caution and that is no bad thing. But every site is unique and needs to be assessed accordingly.
“For instance, we were digging into chalk, so we made adaptations to the advice to accommodate the solidity of the chalk base and drainage implications.”
Construction involves laying a concrete slab on which to build the swimming zone walls. “Concrete is expensive stuff and you don’t want to waste it. What worked well for us was using a company that mixes the concrete on site as you pour it – you only then pay for what you use and a piping lorry that pumped the concrete evenly and quickly into the mould.
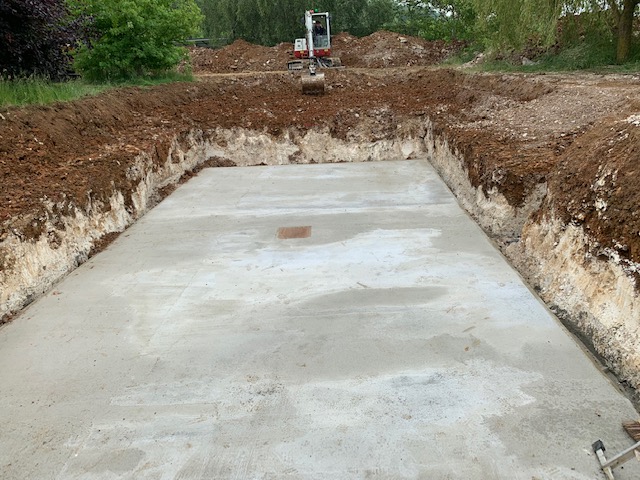
“Time spend in preparation for the concrete pour is far from wasted – getting the ground as level as possible, making a strong mould into which to pour the concrete and getting the drain set accurately with its associated pipework to the outside of the swim zone.”
The drain is a key piece of kit. Water and air are pumped up into the swim zone through the drain. “Once the concrete is poured, there’s no going back.”
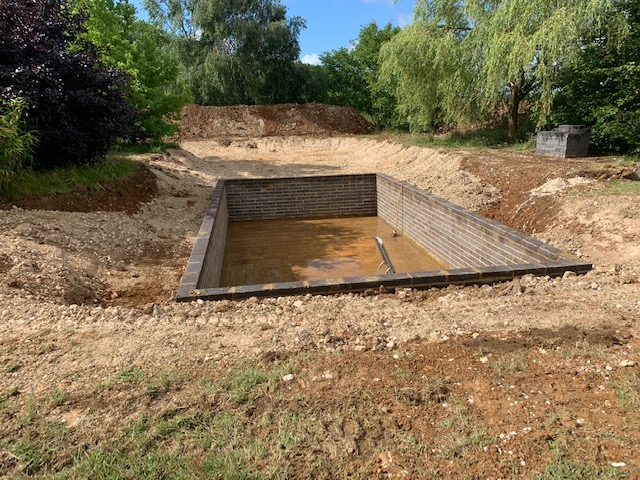
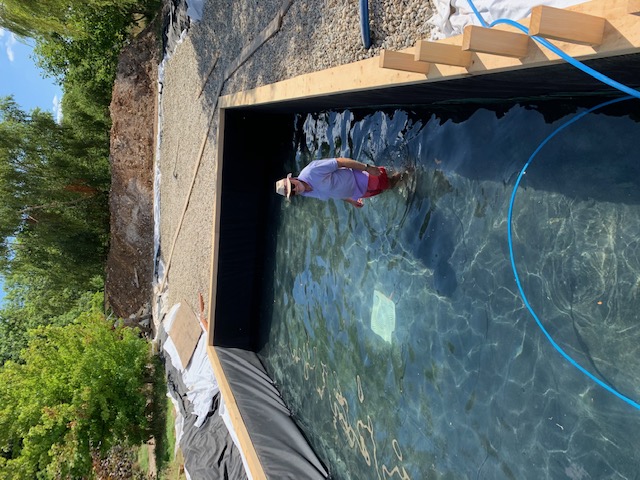
Charles employed a local bricklayer to build the masonry block walls of the swimming zone. When the black pond liner arrived on site, it was tightly packed into a bundle. “The material is both heavy and cumbersome. This is the moment to offer three or four hearty comrades a beer or two for about two hours’ work. With the right muscle it does indeed unfurl and flop into place in accordance with the instruction. The outcome is a moment of joy – your muddy hole with brickwork has miraculously transformed into your natural swimming pool.”
Planting for a natural pool is key. Aquatic plants growing in and around the pond suck up any algae to hopefully prevent the water turning murky. Common species used to filter include marsh marigold, flag iris, loosestrife, hop sedge, water mint and water lilies. With no chlorine or chemicals, everything is natural apart from a mechanical pump to circulate water and air.
What about the pump room? “At the end of the day, it is a hole in the ground that accommodates three pumps – two for water and one for the air compressor and any other gizmos you wish to factor in.” Charles plans to incorporate the pump room into a cabin with a changing room and storage for “the inevitable inflatable swan the young require.”
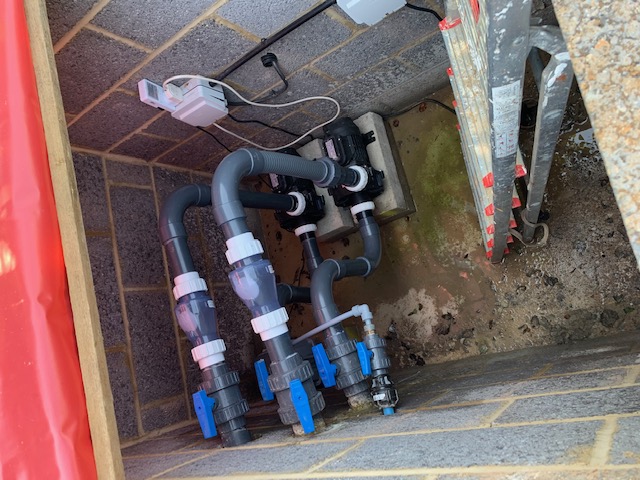
Charles describes heating a natural pond as a “travesty.” He said: “You can - but in my book you might as well have an ordinary pool if you do. In the summer, the water temperature should be more than 25°C as the gravel is shallow and acts as a radiator to the water being filtered through it.”
Prices for natural swimming ponds and pools are similar. Costs for professional installations on a typical 10m x 5m pool, that include all groundworks, materials and kit average around £80,000. Charles splashed out £30,000 on his pond project - saving a small fortune by going down the DIY route.
Now Charles enjoys a daily dip in all weathers (without wearing a wetsuit) while the rest of his family, including his grandchildren, love to splash about in summer. “We’re really happy with our pond; it’s what we envisioned - an attractive water feature that enhances the environment and we can swim in it.”